


 3:26 PM
 Unknown
Installing Windows Server 2008 is pretty straightforward and is very much like installing Windows Vista, but I thought I'd list the necessary steps here for additional information. For those of you who have never installed Vista before, the entire installation process is different than it used to be in previous Microsoft operating systems, and notably much easier to perform.
Using Vista's installation routine is a major benefit, especially for a server OS. Administrators can partition the system's hard drives during setup. More importantly, they can install the necessary AHCI or RAID storage drivers from a CD/DVD or even a USB thumb drive. Thus, error-prone floppies can finally be sent to the garbage bin.
Note: Windows Server 2008 can also be installed as a Server Core installation, which is a cut-down version of Windows without the Windows Explorer GUI. Because you don’t have the Windows Explorer to provide the GUI interface that you are used to, you configure everything through the command line interface or remotely using a Microsoft Management Console (MMC). The Server Core can be used for dedicated machines with basic roles such as Domain controller/Active Directory Domain Services, DNS Server, DHCP Server, file server, print server, Windows Media Server, IIS 7 web server and Windows Server Virtualization virtual server.
To use Windows Server 2008 you need to meet the following hardware requirements:
Upgrade notes:
I will not discuss the upgrade process in this article, but for your general knowledge, the upgrade paths available for Windows Server 2008 shown in the table below:
Follow this procedure to install Windows Server 2008:
1. Insert the appropriate Windows Server 2008 installation media into your DVD drive. If you don't have an installation DVD for Windows Server 2008, you can download one for free from Microsoft's Windows 2008 Server Trial website.
2. Reboot the computer.
 3. When prompted for an installation language and other regional options, make your selection and press Next.
 4. Next, press Install Now to begin the installation process.
 5. Product activation is now also identical with that found in Windows Vista. Enter your Product ID in the next window, and if you want to automatically activate Windows the moment the installation finishes, click Next.

If you do not have the Product ID available right now, you can leave the box empty, and click Next. You will need to provide the Product ID later, after the server installation is over. Press No.
 6. Because you did not provide the correct ID, the installation process cannot determine what kind of Windows Server 2008 license you own, and therefore you will be prompted to select your correct version in the next screen, assuming you are telling the truth and will provide the correct ID to prove your selection later on.
 7. If you did provide the right Product ID, select the Full version of the right Windows version you're prompted, and click Next.
 8. Read and accept the license terms by clicking to select the checkbox and pressing Next.
 9. In the "Which type of installation do you want?" window, click the only available option – Custom (Advanced).
 10. In the "Where do you want to install Windows?", if you're installing the server on a regular IDE hard disk, click to select the first disk, usually Disk 0, and click Next.

If you're installing on a hard disk that's connected to a SCSI controller, click Load Driver and insert the media provided by the controller's manufacturer.
If you're installing in a Virtual Machine environment, make sure you read the "Installing the Virtual SCSI Controller Driver for Virtual Server 2005 on Windows Server 2008"
If you must, you can also click Drive Options and manually create a partition on the destination hard disk.
11. The installation now begins, and you can go and have lunch. Copying the setup files from the DVD to the hard drive only takes about one minute. However, extracting and uncompressing the files takes a good deal longer. After 20 minutes, the operating system is installed. The exact time it takes to install server core depends upon your hardware specifications. Faster disks will perform much faster installs… Windows Server 2008 takes up approximately 10 GB of hard drive space.
 The installation process will reboot your computer, so, if in step #10 you inserted a floppy disk (either real or virtual), make sure you remove it before going to lunch, as you'll find the server hanged without the ability to boot (you can bypass this by configuring the server to boot from a CD/DVD and then from the hard disk in the booting order on the server's BIOS)
12. Then the server reboots you'll be prompted with the new Windows Server 2008 type of login screen. Press CTRL+ALT+DEL to log in.
 13. Click on Other User.
 14. The default Administrator is blank, so just type Administrator and press Enter.
 15. You will be prompted to change the user's password. You have no choice but to press Ok.
 16. In the password changing dialog box, leave the default password blank (duh, read step #15…), and enter a new, complex, at-least-7-characters-long new password twice. A password like "topsecret" is not valid (it's not complex), but one like "T0pSecreT!" sure is. Make sure you remember it.
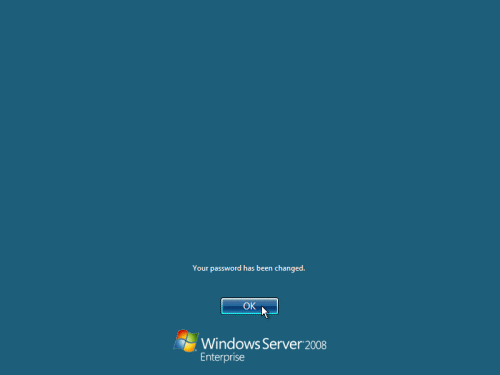
17. Someone thought it would be cool to nag you once more, so now you'll be prompted to accept the fact that the password had been changed. Press Ok.

 18. Finally, the desktop appears and that's it, you're logged on and can begin working. You will be greeted by an assistant for the initial server configuration, and after performing some initial configuration tasks, you will be able to start working.
Next, for the initial configuration tasks please follow my other Windows Server 2008 articles found on the Related Windows Server 2008 Articles section below.
For Official Microsoft information on Windows Server 2008, see the Windows Server 2008 homepage.
Note: Windows Server 2008 can also be installed as a Server Core installation, which is a cut-down version of Windows without the Windows Explorer GUI. Because you don’t have the Windows Explorer to provide the GUI interface that you are used to, you configure everything through the command line interface or remotely using a Microsoft Management Console (MMC). The Server Core can be used for dedicated machines with basic roles such as Domain controller/Active Directory Domain Services, DNS Server, DHCP Server, file server, print server, Windows Media Server, IIS 7 web server and Windows Server Virtualization virtual server.

To use Windows Server 2008 you need to meet the following hardware requirements:
| Component | Requirement |
| Processor | • Minimum: 1GHz (x86 processor) or 1.4GHz (x64 processor) • Recommended: 2GHz or faster Note: An Intel Itanium 2 processor is required for Windows Server 2008 for Itanium-based Systems |
| Memory | • Minimum: 512MB RAM • Recommended: 2GB RAM or greater • Maximum (32-bit systems): 4GB (Standard) or 64GB (Enterprise and Datacenter) • Maximum (64-bit systems): 32GB (Standard) or 2TB (Enterprise, Datacenter and Itanium-based Systems) |
| Available Disk Space | • Minimum: 10GB • Recommended: 40GB or greater Note: Computers with more than 16GB of RAM will require more disk space for paging, hibernation, and dump files |
| Drive | DVD-ROM drive |
| Display and Peripherals | • Super VGA (800 x 600) or higher-resolution monitor • Keyboard • Microsoft Mouse or compatible pointing device |
I will not discuss the upgrade process in this article, but for your general knowledge, the upgrade paths available for Windows Server 2008 shown in the table below:
| If you are currently running: | You can upgrade to: |
| Windows Server 2003 Standard Edition (R2, Service Pack 1 or Service Pack 2) | Full Installation of Windows Server 2008 Standard Edition Full Installation of Windows Server 2008 Enterprise Edition |
| Windows Server 2003 Enterprise Edition (R2, Service Pack 1 or Service Pack 2) | Full Installation of Windows Server 2008 Enterprise Edition |
| Windows Server 2003 Datacenter Edition (R2, Service Pack 1 or Service Pack 2) | Full Installation of Windows Server 2008 Datacenter Edition |
1. Insert the appropriate Windows Server 2008 installation media into your DVD drive. If you don't have an installation DVD for Windows Server 2008, you can download one for free from Microsoft's Windows 2008 Server Trial website.
2. Reboot the computer.
If you do not have the Product ID available right now, you can leave the box empty, and click Next. You will need to provide the Product ID later, after the server installation is over. Press No.
If you're installing on a hard disk that's connected to a SCSI controller, click Load Driver and insert the media provided by the controller's manufacturer.
If you're installing in a Virtual Machine environment, make sure you read the "Installing the Virtual SCSI Controller Driver for Virtual Server 2005 on Windows Server 2008"
If you must, you can also click Drive Options and manually create a partition on the destination hard disk.
11. The installation now begins, and you can go and have lunch. Copying the setup files from the DVD to the hard drive only takes about one minute. However, extracting and uncompressing the files takes a good deal longer. After 20 minutes, the operating system is installed. The exact time it takes to install server core depends upon your hardware specifications. Faster disks will perform much faster installs… Windows Server 2008 takes up approximately 10 GB of hard drive space.
12. Then the server reboots you'll be prompted with the new Windows Server 2008 type of login screen. Press CTRL+ALT+DEL to log in.
Next, for the initial configuration tasks please follow my other Windows Server 2008 articles found on the Related Windows Server 2008 Articles section below.
For Official Microsoft information on Windows Server 2008, see the Windows Server 2008 homepage.


